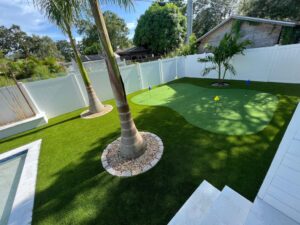
Installing artificial grass can transform your outdoor space into a low-maintenance, lush area that remains green year-round. However, understanding the installation process and what to expect can help you make informed decisions and ensure a successful project. Here’s a comprehensive overview of what to expect when installing artificial grass:
1. Preparation and Planning
Assessment and Design: Before installation, assess your space and plan the design. Determine the area where you want to install artificial grass and measure it accurately. Decide on the type and color of artificial grass that best suits your needs and preferences.
Site Preparation: The area must be cleared of existing grass, weeds, rocks, and debris. If there is existing grass, it will be removed, and the ground will be leveled. Proper drainage is also crucial; any low spots should be filled, and the area should be graded to ensure water does not pool on the surface.
2. Base Installation
Creating a Base Layer: A solid base is essential for a stable and long-lasting artificial grass installation. Typically, a base layer of crushed stone or gravel is spread and compacted to provide a firm foundation and proper drainage.
Installing a Weed Barrier: A weed barrier fabric is often laid over the base layer to prevent weeds from growing through the artificial grass. This fabric allows water to drain while blocking weed growth.
3. Laying the Artificial Grass
Rolling Out the Turf: The synthetic turf is rolled out over the prepared base. The rolls should be laid out in the direction that will give the most natural look. It’s important to allow the grass to acclimate and settle for a few hours before cutting and securing it.
Cutting and Shaping: The artificial grass is cut to fit the area precisely. This involves trimming the edges and fitting the grass around obstacles like flower beds or garden features.
4. Securing the Grass
Joining Seams: If the installation requires multiple rolls of turf, the seams are joined using specialized seam tape and adhesive. This ensures a seamless appearance and prevents gaps where the grass meets.
Staking and Anchoring: The edges of the artificial grass are secured with stakes or nails to keep it in place. This is particularly important along the perimeter of the installation area.
5. Infill Application
Adding Infill Material: Infill material, such as sand or rubber granules, is spread over the surface of the artificial grass. The infill helps to weigh down the turf, provide cushioning, and maintain the upright position of the grass fibers. It also aids in drainage and reduces static electricity.
Brushing the Turf: After the infill is applied, the artificial grass is brushed to ensure the infill is evenly distributed and to help the grass fibers stand upright. This step also gives the turf a natural appearance.
6. Final Inspection and Maintenance
Inspection: A final inspection is conducted to ensure the installation is complete and meets quality standards. Check for any visible seams, gaps, or uneven areas that may need adjustment.
Initial Maintenance: For the first few weeks, you may need to perform light brushing to help the grass settle and achieve its final appearance. Regular maintenance includes removing debris, brushing the turf, and rinsing it with water if necessary.
7. Long-Term Care
Ongoing Maintenance: Artificial grass is low-maintenance but not maintenance-free. Regularly remove leaves and debris, brush the grass occasionally to maintain its appearance, and address any spills or stains promptly.
Inspect for Wear and Tear: Periodically check for signs of wear, such as flattened areas or damage. Proper care can extend the life of your artificial grass and keep it looking its best.
By understanding these steps and what to expect during the installation of artificial grass, you can ensure a smooth process and enjoy the benefits of a beautiful, low-maintenance lawn.


Recent Comments