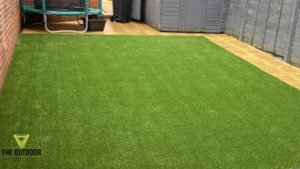
Installing synthetic grass is an excellent way to create a low-maintenance, aesthetically pleasing outdoor space. Whether for a backyard, playground, or commercial property, artificial grass provides a durable and attractive alternative to natural grass. Understanding the installation process can help ensure a successful project. Here, we outline the critical steps involved in installing synthetic grass.
Preparation and Planning
The first step in the synthetic grass installation is thorough preparation and planning. This involves measuring the area to determine the amount of artificial grass needed and ensuring the site is prepared correctly. Removing any existing grass, weeds, or debris from the region is crucial. This can be done manually or with the help of specialized equipment. Once the area is cleared, it’s time to assess the ground’s slope and drainage to ensure proper water runoff. Adequate planning and preparation lay the foundation for a smooth and successful installation.
Base Installation
Creating a solid base is essential for the longevity and performance of synthetic grass. The base installation begins with applying a layer of crushed rock or decomposed granite. This layer, typically about 2-4 inches thick, helps to create a stable and well-draining foundation. After spreading the base material evenly, it should be compacted using a plate compactor to ensure a firm and level surface. This step is crucial for preventing uneven surfaces and ensuring the synthetic grass lays flat and looks natural.
Laying and Securing the Grass
Once the base is prepared, the synthetic grass can be laid out. It’s essential to unroll the grass and let it sit for a few hours to allow it to acclimate and relax. This makes it easier to handle and ensures a smoother installation. The grass should be laid out to minimize seams and cuts. Sharp utility knives should be used when cutting is necessary to achieve clean edges. Landscape staples or nails are driven into the base along the perimeter and seams to secure the grass. This step ensures the grass remains in place and prevents movement over time.
Infill Application
Infill is a critical component of synthetic grass installation, as it helps to keep the grass blades upright and provides additional cushioning. Infill materials vary, but standard options include silica sand or crumb rubber. The infill is evenly distributed over the synthetic grass using a drop spreader. Once applied, a power broom or stiff bristle broom is used to brush the infill into the grass, ensuring it settles between the blades. This step not only enhances the appearance of the grass but also improves its performance and durability.
Final Touches and Maintenance
The final touches of the installation process involve inspecting the area for any imperfections and making necessary adjustments. This may include trimming edges, adding more infill, or brushing the grass to ensure an even appearance. Once the installation is complete, the synthetic grass requires minimal maintenance. Regular brushing helps to keep the blades upright, and occasional rinsing removes dust and debris. Following these steps and adequately maintaining the synthetic grass, you can enjoy a beautiful and low-maintenance outdoor space for years to come.
In conclusion, installing synthetic grass involves careful preparation, creating a solid base, laying and securing the grass, applying infill, and performing final touches. Each step is crucial to ensure a successful and long-lasting installation. By understanding and following this process, you can achieve a beautiful, durable, and low-maintenance outdoor space that enhances the aesthetics and functionality of your property.
12600 S Belcher Rd Suite 106A, Largo, FL 33773, USA
(888) 297-6972


Recent Comments