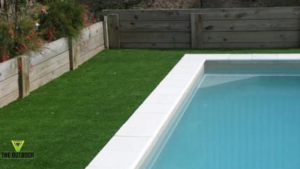
Artificial turf is an excellent alternative to natural grass, offering a low-maintenance, green solution for your outdoor spaces. Installing artificial turf may seem like a daunting task, but with the right tools and a step-by-step approach, you can achieve a professional-looking installation. Here’s how to install artificial turf the professional way.
Step 1: Planning and Measuring
1.1 Assess the Area
- Determine the dimensions of the area where you want to install the artificial turf.
- Check for any slopes, drainage issues, or obstacles that may need to be addressed.
1.2 Gather Materials and Tools
- Artificial turf
- Weed barrier fabric
- Crushed rock or gravel
- Sand
- Turf adhesive or nails
- Utility knife
- Turf cutter
- Rake
- Broom
- Tape measure
- Landscape staples
Step 2: Preparing the Ground
2.1 Clear the Area
- Remove any existing grass, weeds, rocks, and debris from the installation area.
- Use a sod cutter or shovel to remove the top layer of soil to a depth of about 3-4 inches.
2.2 Install the Weed Barrier
- Lay down a weed barrier fabric to prevent weeds from growing through the turf.
- Secure the fabric with landscape staples.
2.3 Add the Base Layer
- Spread a layer of crushed rock or gravel over the area, about 2-3 inches deep.
- Use a rake to level the base layer.
- Compact the base layer using a plate compactor or hand tamper to create a firm, level surface.
2.4 Add a Layer of Sand
- Spread a thin layer of sand over the compacted base to create a smooth surface for the turf.
- Use a rake to level the sand and a compactor to ensure it is firm.
Step 3: Laying the Artificial Turf
3.1 Roll Out the Turf
- Unroll the artificial turf and let it sit for a few hours to acclimate and relax any wrinkles.
- Place the turf over the prepared base, ensuring it covers the entire area.
3.2 Cut to Fit
- Use a utility knife to trim the turf to fit the shape of your area.
- Ensure the edges are flush with any borders or edges.
3.3 Seam the Pieces Together
- If your installation requires multiple pieces of turf, place them together with the fibers running in the same direction.
- Use turf adhesive or seaming tape to join the pieces together.
- Apply the adhesive or tape along the edges and press the seams firmly together.
Step 4: Securing the Turf
4.1 Anchor the Turf
- Use landscape staples or turf nails to secure the turf around the perimeter and at the seams.
- Place the staples or nails about 6 inches apart along the edges and seams, ensuring they are flush with the surface.
4.2 Brush the Turf
- Use a stiff broom to brush the turf fibers against the grain to help them stand up.
- This will give the turf a more natural look and feel.
Step 5: Adding Infill
5.1 Spread the Infill
- Apply a layer of infill material, such as silica sand or rubber granules, over the turf.
- Use a drop spreader to distribute the infill evenly.
5.2 Brush the Infill
- Use a broom or power brush to work the infill into the turf fibers.
- Brush in different directions to ensure the infill settles evenly and supports the turf fibers.
Step 6: Final Touches
6.1 Inspect and Adjust
- Check the entire area for any loose edges, seams, or areas that need additional infill.
- Make any necessary adjustments to ensure a smooth, even surface.
6.2 Clean Up
- Remove any excess materials and tools from the site.
- Give the turf a final brush to ensure the fibers are standing upright and the surface looks uniform.
Conclusion
Installing artificial turf the professional way involves careful planning, precise execution, and attention to detail. By following these steps, you can create a beautiful, low-maintenance outdoor space that will last for years. With proper installation, your artificial turf will look natural, provide excellent drainage, and withstand heavy use, making it a valuable addition to any home or landscape.

12600 S Belcher Rd Suite 106A, Largo, FL 33773, USA
(888) 297-6972

Recent Comments