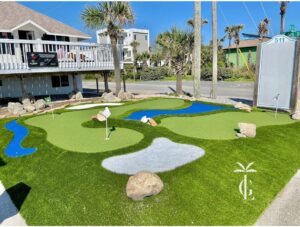
Creating an artificial turf putting green in your backyard is a fantastic way to practice your golf game without leaving home. A well-designed putting green not only enhances your outdoor space but also provides a professional-grade surface for honing your skills. Here’s a comprehensive guide to help you achieve the perfect artificial turf putting green.
1. Plan Your Design
Assess Your Space:
- Determine the size and shape of the putting green based on the available space in your yard. Consider incorporating features like slopes, bunkers, or multiple holes for added challenge.
Design Features:
- Sketch out your design, including the location of cups, contours, and any obstacles. Use design software or consult with a professional for precise planning.
Check Local Regulations:
- Ensure you’re aware of any local regulations or restrictions regarding outdoor installations or landscaping.
2. Gather Materials and Tools
Materials:
- Artificial turf specifically designed for putting greens
- Landscape fabric
- Gravel or crushed stone
- Paver base or decomposed granite
- Sand
- Putting cups and flags
- Edging materials (e.g., plastic or metal edging)
- Adhesive or turf nails
Tools:
- Shovel and rake
- Tape measure
- Utility knife
- Level
- Garden hose or spray bottle
- Compactor (optional, for larger areas)
3. Prepare the Area
Clear the Site:
- Remove any existing grass, weeds, or debris from the area where you plan to install the putting green.
Excavate and Grade:
- Excavate the area to a depth of 3-4 inches to accommodate the base materials. Ensure the area is graded to create a smooth, level surface.
Install Edging:
- Place edging around the perimeter to keep the artificial turf in place and prevent it from shifting over time.
4. Build the Base
Lay Landscape Fabric:
- Spread landscape fabric over the prepared area to prevent weed growth and improve drainage.
Add Gravel or Crushed Stone:
- Pour a layer of gravel or crushed stone, about 2 inches thick, and level it. This layer provides drainage and stability for the turf.
Compact the Base:
- Use a compactor to compress the gravel or crushed stone, creating a firm and level base. This step is crucial for ensuring a smooth putting surface.
Add Paver Base or Decomposed Granite:
- Spread a layer of paver base or decomposed granite over the gravel and level it. This material helps create a smooth, stable surface for the artificial turf.
Screed and Compact:
- Screed the surface with a straight edge to ensure it’s level. Compact the paver base or decomposed granite to create a firm, even base.
5. Install the Artificial Turf
Roll Out the Turf:
- Roll out the artificial turf over the prepared base. Allow the turf to acclimate to the area for a few hours before cutting and fitting.
Cut and Fit:
- Trim the edges of the turf to fit the shape of your putting green using a utility knife. Make precise cuts to ensure a clean fit around edges and obstacles.
Secure the Turf:
- Attach the turf to the base using adhesive or turf nails. Make sure the turf is tightly secured and smooth out any wrinkles or bubbles.
Add Sand Infill (if required):
- Some putting greens require sand infill to provide stability and mimic the feel of natural grass. Spread a thin layer of sand over the turf and brush it in to fill the fibers.
6. Install Putting Cups and Flags
Place Putting Cups:
- Position the putting cups in the designated holes according to your design. Secure them in place with adhesive or by cutting out a small hole in the turf and fitting the cup.
Add Flags:
- Insert putting flags into the cups. Adjust the height of the flags as needed to suit your preference.
7. Finalize and Maintain
Inspect and Adjust:
- Check the overall appearance of the putting green and make any necessary adjustments. Ensure the turf is securely in place and the cups are properly aligned.
Regular Maintenance:
- Keep the putting green clean by removing debris and brushing the turf to maintain its appearance and performance.
Practice and Enjoy:
- Enjoy your new putting green! Use it to practice your putting skills and enhance your golf game.
By following these steps, you can create a high-quality artificial turf putting green that provides a professional-grade surface right in your backyard. Whether for practice or recreation, a well-constructed putting green enhances your outdoor space and offers endless enjoyment.


Recent Comments